
How to Avoid Killing Your Seeds (Part 1)

I’m three generations removed from needing to grow my dinner, maybe four. A lot of seeds have suffered and died while I try to get back to the land.
Grandma’s dad had chickens, but she didn’t, so neither did my Dad. Grandma went to the store for her food. The modern grocery store exploded in the 50’s and 60’s. There were ready-made foods and ingredients available all the time.
In my grandma’s time, industrial food in space age cans and boxes let anyone get dinner on the table in seconds. Before the big store, salads in winter were parlor tricks for rich people.
By Mom’s time, food growing and preservation skills were downgraded from essential to nostalgia. Mom canned jam and had small gardens, but it was a hobby. Most people went to the store.
When I decided to try to grow food for real, I knew there’d be some work involved—dropping seeds in the ground, watering during dry spells, and harvesting, but after three generations these skills were almost removed from my DNA.
I imagined a few hours of raking, weeding once in a while, and coming back in a few months with a big basket and picking up my dinner—like Mother Nature’s drive thru.
This is what happened every year instead:
March: Plant the seeds.
Soon after March: Kill the seeds.
April: Plant and kill a second bunch just in case.
April, May, June: Go to a greenhouses and buy all the seedlings I killed
Now that I’m seeing some success, I wish I found and listened to farmers sooner. Most people don’t realize where their food comes from and how many things go into getting it to the table. I thought I knew, but I was wrong. It isn’t dropping seeds in dirt—it’s a ton of science.
There are no short cuts with science.
(Go find a local farmer and say thanks. Right now.)
How to have a big seed victory
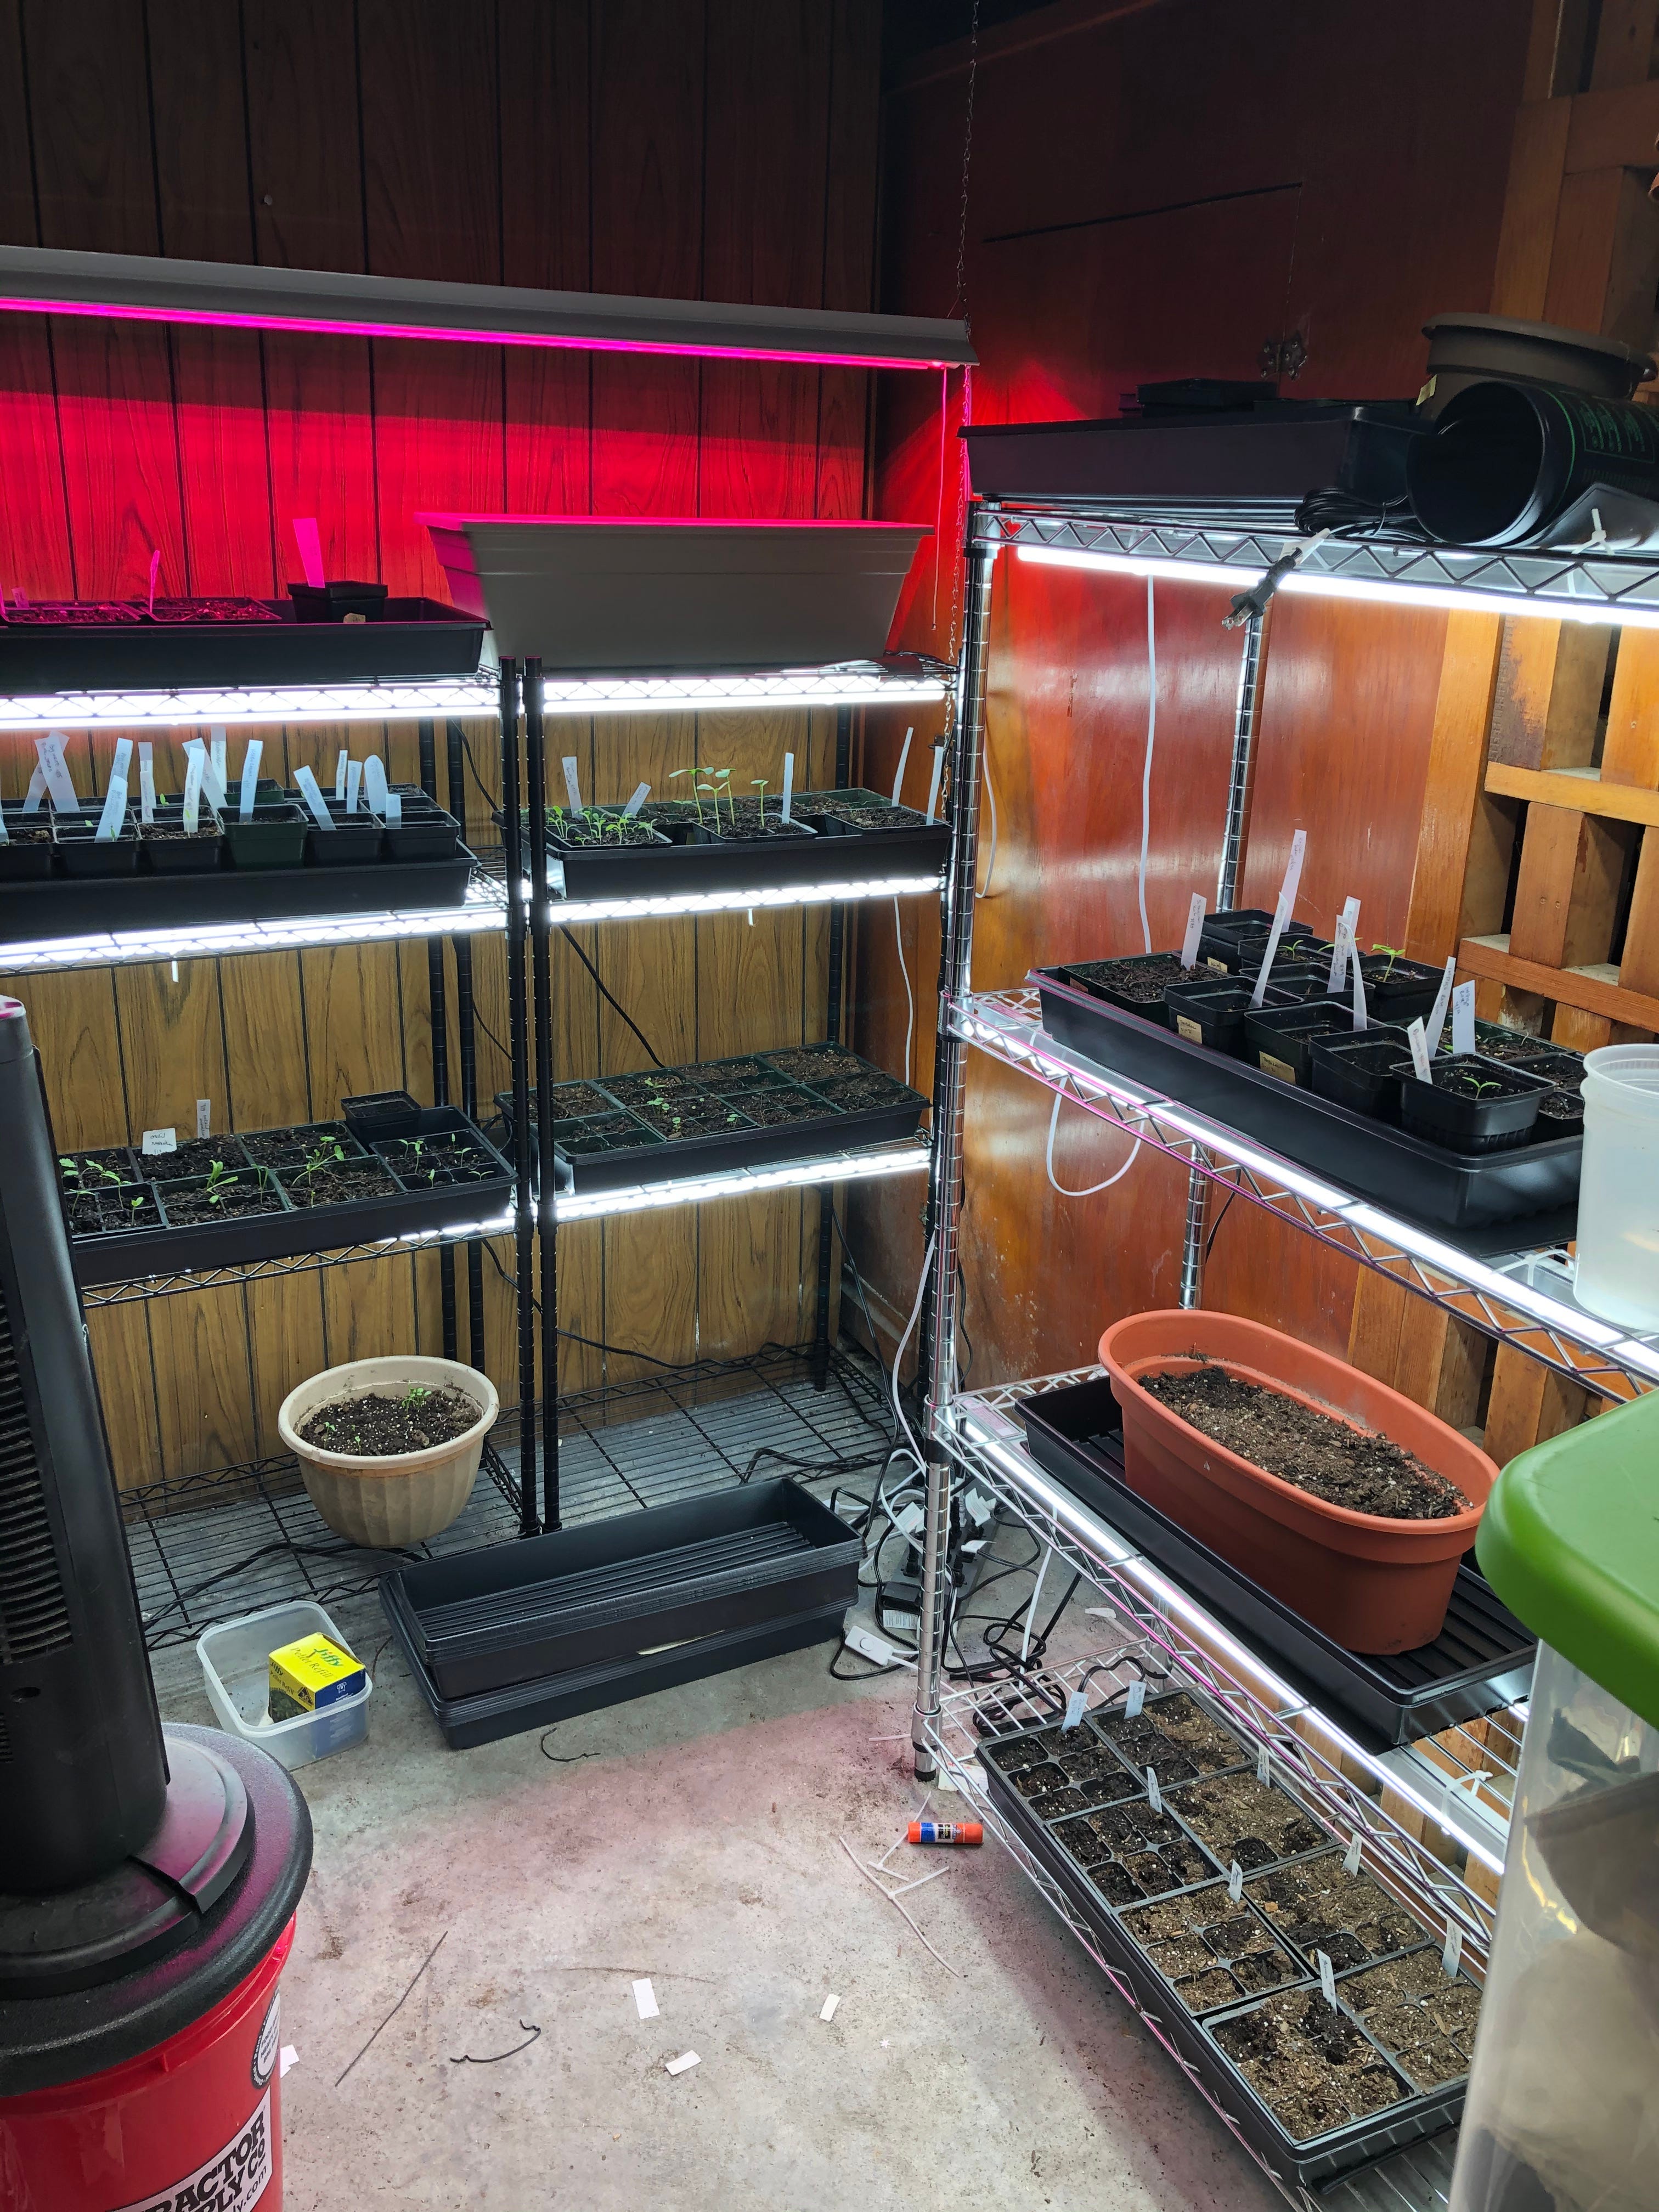
Seeds need four things to succeed—heat, light, water, and nutrients. Putting a seed in a window isn’t enough—you need a good setup. There are a ton of ready-made systems online, from the $150 tabletop garden that grows three herbs or the kitchen setups with lettuce sticking out of it for $1000.
Don’t get those. My setup (above) cost about $170-200.
Metal shelves
Altogether, these three shelves holds twelve trays of seeds and some pots on the side. (Total cost—$100). Two were at a discount store, and the silver one was from a business that was closing down.
Lights
I bought two sizes of these LED shop lights (recommended by two master gardeners) and zip tied them to the racks. These shop lights come in various sizes and quantities and they string together so I only needed two plugs. That’s important.
The top light on the right shelves is a $15 from my local discount store. It was the first one I bought before learning about the shop lights. It has a different light spectrum more suited for flowers, I later learned.
Pro tip: Lights marketed for growing are much more expensive than home lighting.
My first year, I went to the weed store—if anyone knows lights, it’s the weed people.
“You’re growing lettuce, not ‘lettuce?’ Go to Home Depot,” the cannabis expert said. Specialty lights are top dollar at the cannabis store and overkill for a home garden. They’re still expensive at the big box store if they say “plant” or “gro” on them. A T-5 full-spectrum light, like the one in the link, is most cost effective.
If I ever need a specialty orchid lamp for a competition bloom, I’ll be excited at how much I’ve upped my game. For now, I’ll take the $7 shop light.
Heat
Seeds need to be warm to sprout. A sunbeam isn’t enough. Get heat mats. Here’s the ones I got. If I were doing this again, I’d have bought longer ones for the black shelves to have fewer plugs.
A fan
Every year my seeds got mold. Many of the hydroponic growers and seed starters use small computer fans on their racks. I found this old oscillating fan, put it on low, and it’s working fine.
Strips and power
This computer surge protector strip has twelve plug spaces. I don’t want to have strips plugged into strips. None of my homesteading matters if I burn the house down.
Trays
My local discount store had $1.35 “flat trays” with no holes. A flat tray is what you get at the garden center when you buy the whole rectangle of plants rather than one four or six cell bunch.
You can get flat trays online—either with or without drainage holes, but they were way more expensive.
You can also buy starter pots and four and six cell seed planters online, but I save, stack, and reuse them. The four-cell are better than the six cell. Six-cell are too small.
Pro tip: Wash out last year’s pots and seed starting containers with a 10% bleach solution. Put them all in a big bin and soak them, then rinse.
Microbes and fungus can lie dormant and affect new plants. I’ve never done this. “What’s the point? I’m putting dirt in a pot where there was dirt?” But, it’s Russian roulette. I’ve been lucky.
This year I grew a poisonous mushroom where a tomato should’ve been. It got my attention. Next year, I’ll obey this command.
That’s it—the setup I should’ve made a decade ago but this year, I finally listened, and—surprise—I’m having my first year of seed success.
This is important because I can now plant anything I want. I found family farms preserving generations of rare veggies I’ve never seen before. With any luck, I’m going to grow and eat them. You can’t get those at the garden store.
So… stay tuned for the next part, “How Not to Kill Your Seeds.” We’re still a few steps away from getting these things up and into the garden.